 The Periodic Table Table Construction History
Home
For well over a hundred years the world has failed to take proper notice
of the word "Table" clearly contained in the name of the famous Periodic
Table of the Elements.
One evening while reading
Uncle Tungsten
by Oliver Sacks, I became momentarily confused. He begins a chapter with
a description of a periodic table display he loved to visit in the Kensington Science
Museum, and in mis-reading the paragraph, I thought it was a table,
not the wall display it actually is. While my confusion only lasted a
few seconds, when I found out there wasn't a Periodic Table in the
British Museum, it left a hole I felt I had to fill.
Actually I would never had had this confusion, or built the table, if I hadn't been thinking for the
previous month about the need for a new conference table in my group's common office area.
I had already built the Triangle Table to be our coffee table,
but we needed a conference table too, and I certainly wasn't going to buy one of those expensive
ugly ones from the office supply catalogs.
And I would never have built the table if I didn't happen to have a nice pantograph engraving machine
with a complete set of fonts from the closing out auction of a local hospital (new $1700, mine for $50 with
fonts).
So really the table is a result of three unlikely and totally unrelated factors coming together at the same time,
which probably explains why, to the best of my knowledge, no one else has ever built one like it.
Having decided to make a table, the details fell quickly into place. One thing was immediately obvious: Each element
group (e.g. alkali metals, noble gases, etc) would be represented by a
different type of wood, with suitably clever analogies made between wood grain
and chemical properties. Equally obvious was that the basic matrix of the
table would be made of two-inch-thick Walnut boards, because I have two-inch-thick
Walnut boards up the wazu on account of a fortuitous auction purchase
some years ago.
Because my engraving machine could only handle relatively small
and thin material, the table would have to be made of separate engraved tiles.
Initially, I thought of gluing the tiles into routed out areas of a solid
table, forming a solid surface. But this would have been extremely
tedious, and the result would almost certainly have cracked in many places
almost immediately. The climate here is deeply unforgiving to crossed grain
or dissimilar woods in contact. This led to a plan for loose element tiles,
which quickly led to a plan for holes underneath the tiles. Once I realized
I could then collect elements to go in the holes, all doubt was removed:
I had to make this table.
Drilling 3+ inch diameter holes into hard wood is something best done with
a drill press, and drill presses, at least the kind in my shop, don't normally
have a throat 3 feet deep. So drilling 120 holes into a solid glued up table
top would have been, well, difficult. Also, while my auction Walnut is very
fortuitous, it is also fairly knotty, meaning not a lot of clear long boards
in the lot. The obvious solution was a checkerboard of individual element
blocks, each cut, drilled, and routed in jigs, then glued together on a substrate.
(I should mention that there are several other obvious solutions, and if I were doing it over again,
I would probably pick one of them.)
(Why a checkerboard instead of lining the grain up? Because if you
line the grain up, it begs the question of why you had to cut the boards
in the first place: A checkerboard looks like you wanted it that way.
A checkerboard also distributes the stress and warpage, sort of like
the transpose of plywood.)
As an aside, a brief note on woodworker chauvinism. There are two ends of the spectrum available for the woodworker wishing to have an
attitude. At the one end is what I refer to as the Zen tool collector. This person is likely to tell you about their new hand-ground
Japanese pull saw with teeth personally filed by the master saw maker Ibechi Yamatuthi himself. Their shop will sport the finest in
electronic dust collection equipment, and everything about it will be spotless. Including the dust filter, because they've never
actually built anything.
At the other end of the spectrum is the guy who spits on the floor and says "Hell, I could make a better table than that
using nothing but a broken beer bottle and an old tire iron. And an electric drill. [Snort]". This is the sort of
craftsman who believes that skill and long experience are what matter, not fancy tools from a catalog that looks more
like the Sharper Image than a hardware store.
Although I admit I do own a Japanese miter square, which I bought in Japan no less, and although I do admit that it's
very nice, by and large my sympathies are with the other guy. My chisels are cheap and usually dull: Who has time to
sharpen these things? Although I do use a scraper sometimes, mostly to remove glue, I really prefer hitting it with a
really big random orbit sander. In fact I am thinking of adopting a religion that forbids the use of non-electric tools.
(In my opposite-Amish religion, it would be permissible to attach small blinking LEDs to hand saws and chisels to make
them OK to use, in those rare instances where it's unavoidable.)
I place a premium on using power tools whenever possible because I don't have a lot of time for this stuff. I like to
plan things so that everything can be laid out mechanically with an absolute minimum of careful fitting and hand work.
I just don't have time for it, and as a general rule a good power tool will do the work faster and more accurately than
Mr. Yamatuthi's saw, no matter how long he may have spent aligning each individual tooth.
Something like the Triangle Table had exactly three pieces whose length actually
had to be gotten right: The three outside edges. Everything else was cut to length in place by the next router pass.
And I think this shows in the fact that all the inlays fit perfectly without me having spent any time fitting them (and
in the fact that the outer edges don't, a fact easily remedied with wood putty).
I may eventually start making complex furniture with many pieces that have to be individually cut to fit into each
other. But only after a get a CNC router table that cuts them perfectly for me under computer control.
Without further ado, the construction of the table from start to finish. Click on any image to see a large version open in a separate window.
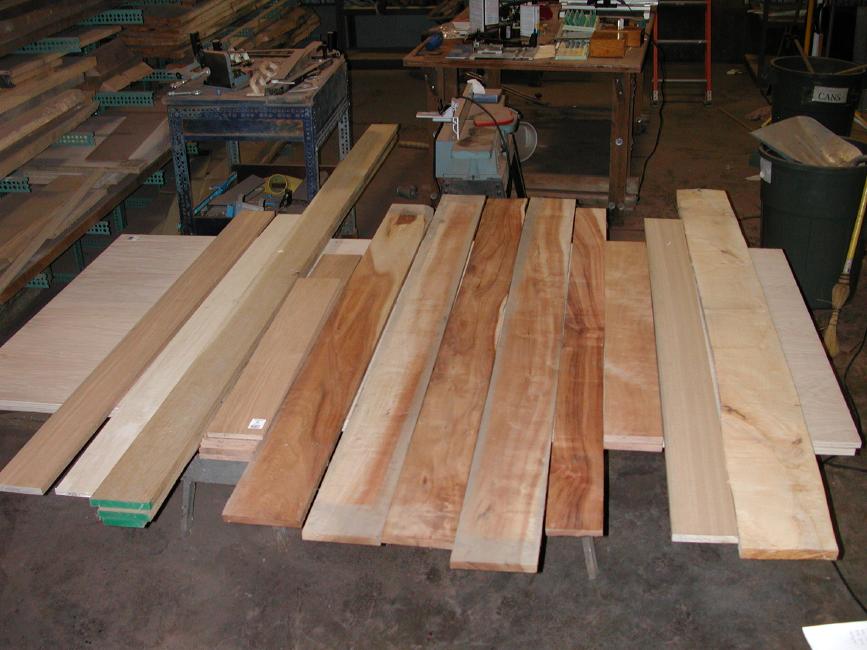
The rough-sawn Walnut (cut and kiln dried in Paris, Illinois in 1993 at the sadly now defunct T. A. Foley Lumber Company)
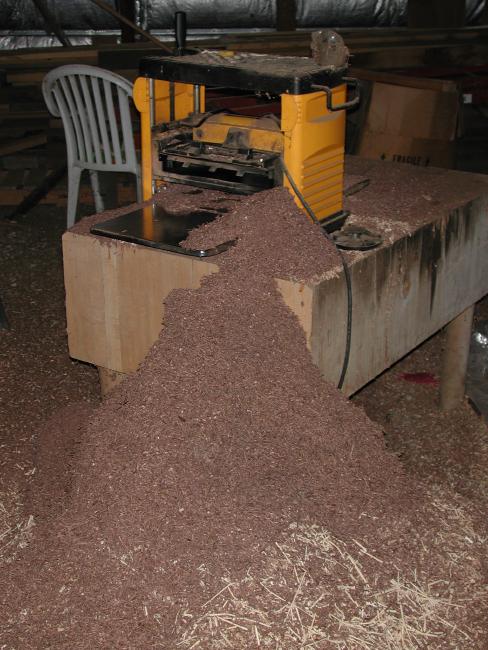
is run through a (cheap but sturdy) planer:
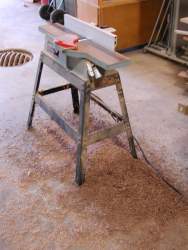
and a (cheap but lousy) jointer:
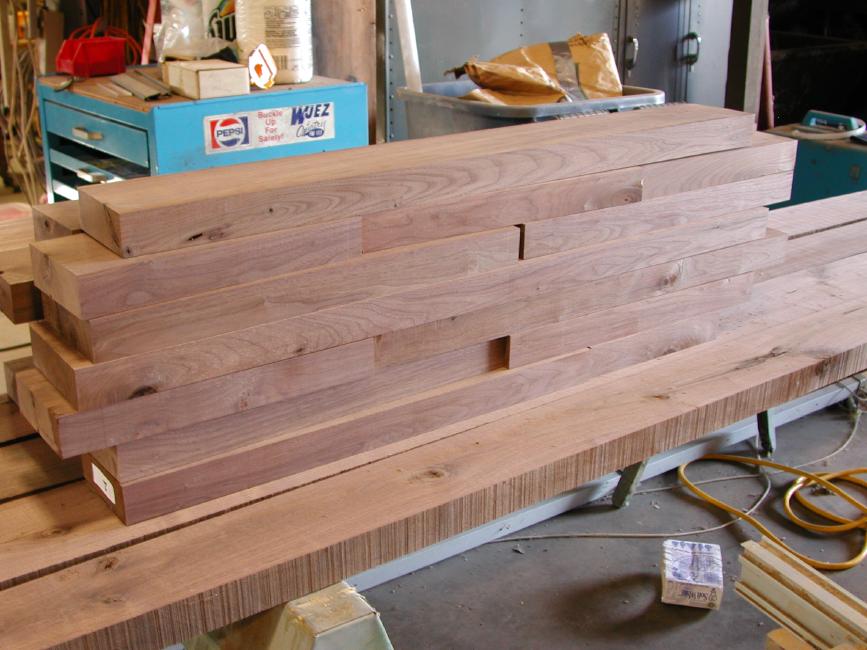
Then the knotty parts are cut out to form a supply of random-length clear
S3S stock to work with:
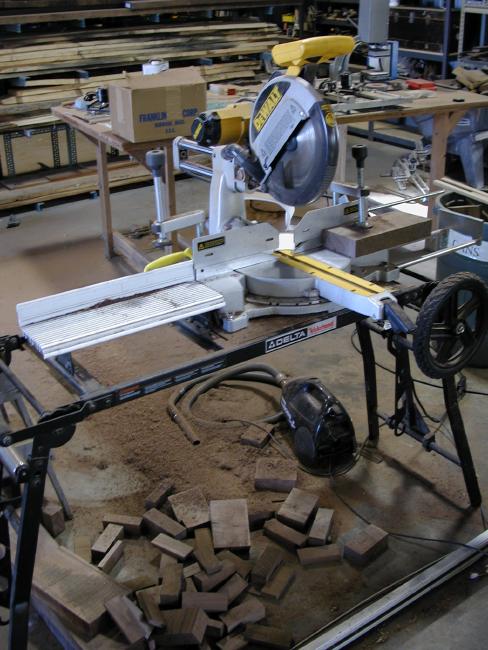
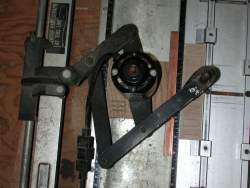
A simple stop block allows the (expensive but fabulous) miter saw:
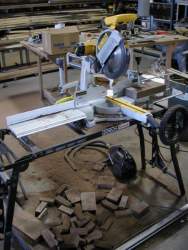
to cut perfect squares:
Note the circles in the end grain and the small hole in the center of the circle (clearly visible in the large version of the picture).
Just to make things interesting, the auction lot I purchased
consisted entirely of dogboard Walnut, which means the board cut from the exact center of the tree. Virtually very single board
contains the very heart of a tree. This makes for some very, ahem, interesting grain patterns. But it was seriously cheap, so I
don't complain too much.
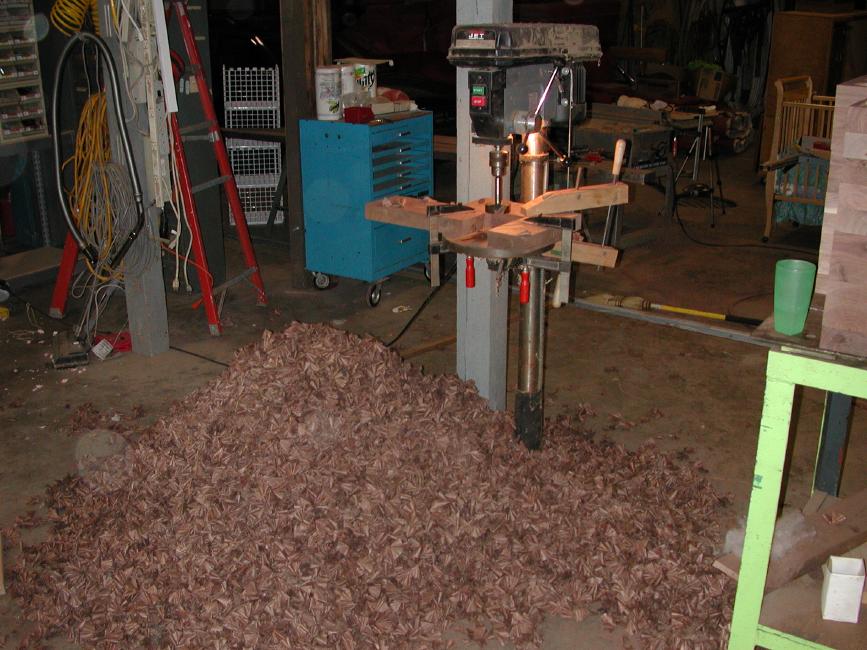
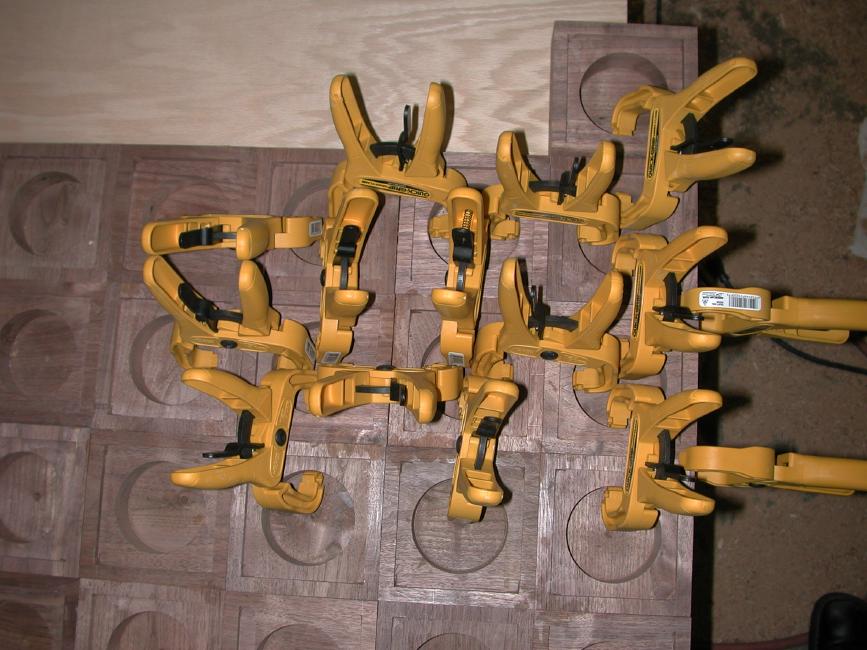
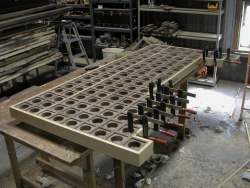
The (cheap and wobbly but on the whole workmanlike) drill press is set
up with a jig and a really big Forstner bit:
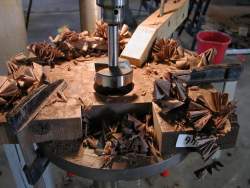
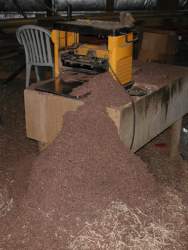
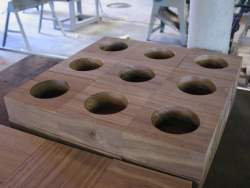
130-odd holes and several sharpenings later we have 130-odd element blocks:
and, as the elephant joke goes, a great big pile of entropy:

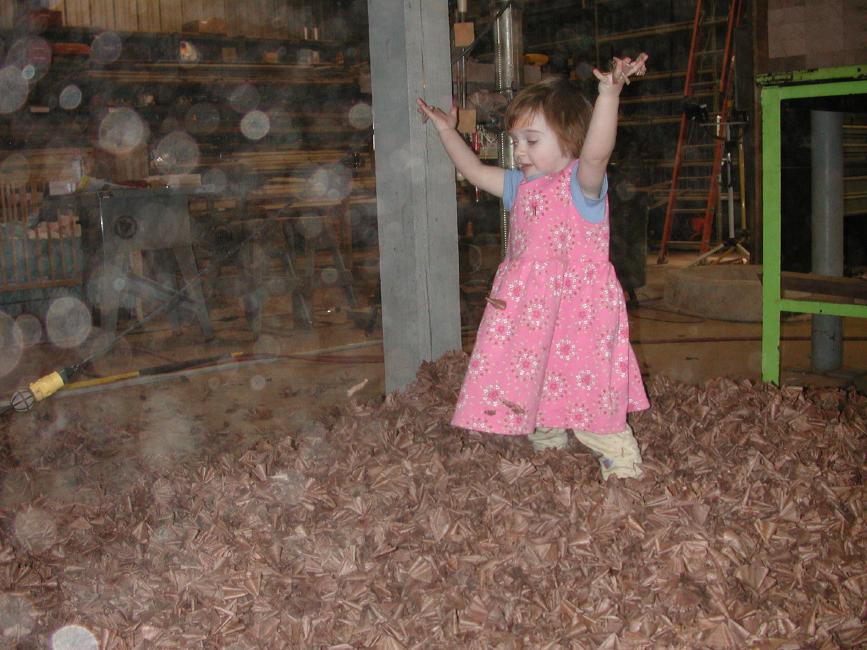
Which the young'uns found something to do with (hope they don't get asthma
or something):

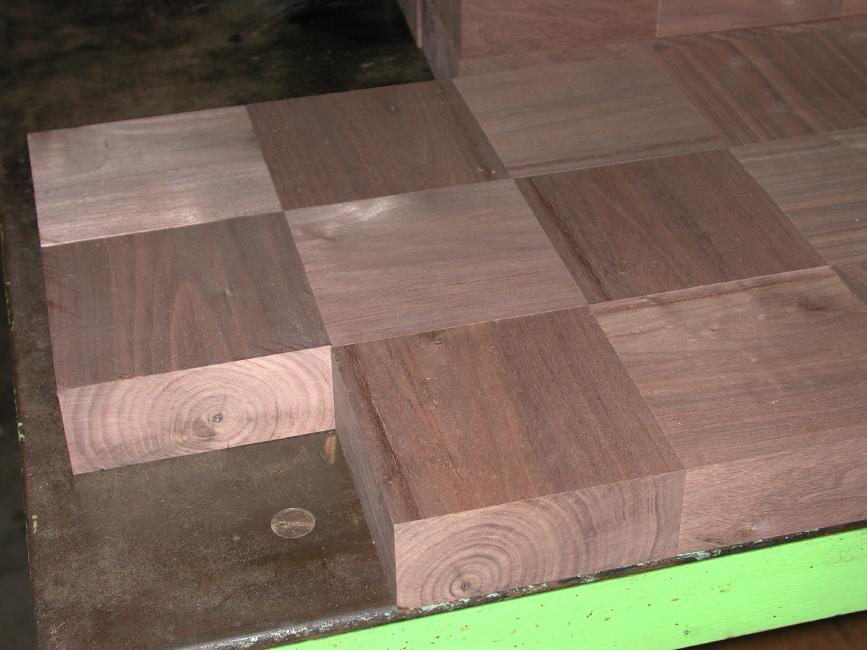
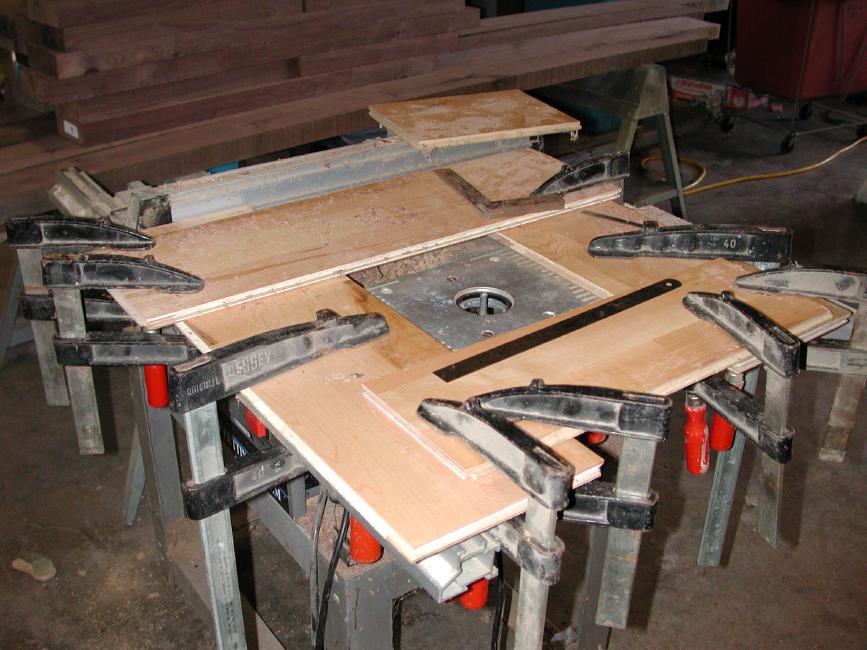
Back to work, a router table is set up with a shiny new router
(old one fell apart recently) and a clever four-sided jig that guaranteed
perfect uniformity:

in the resulting nearly finished element blocks:
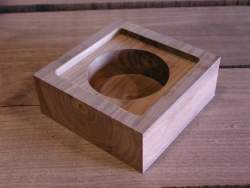
The corners were subsequently squared using a corner chisel,
but shame prevents me from including a photograph
of a non-power tool here.
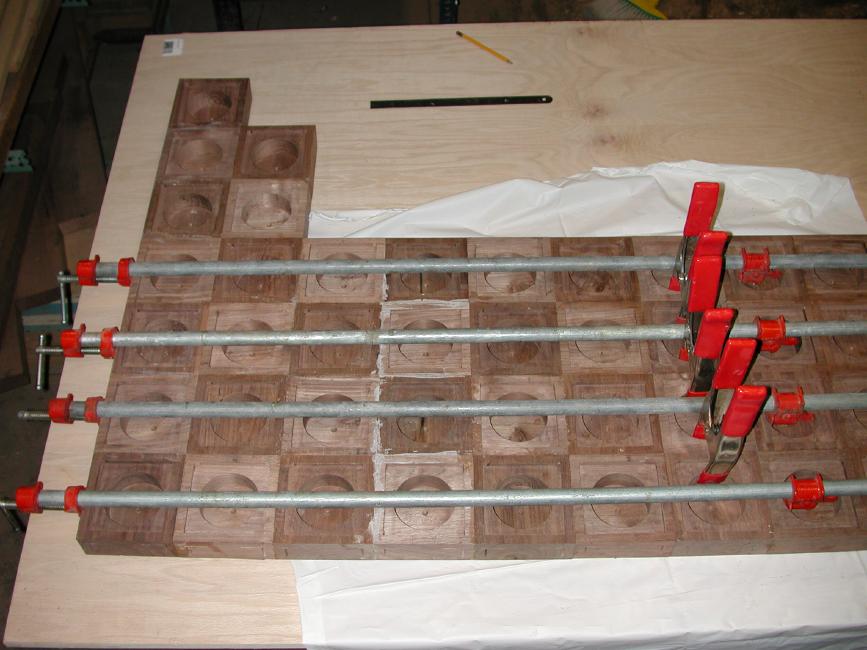
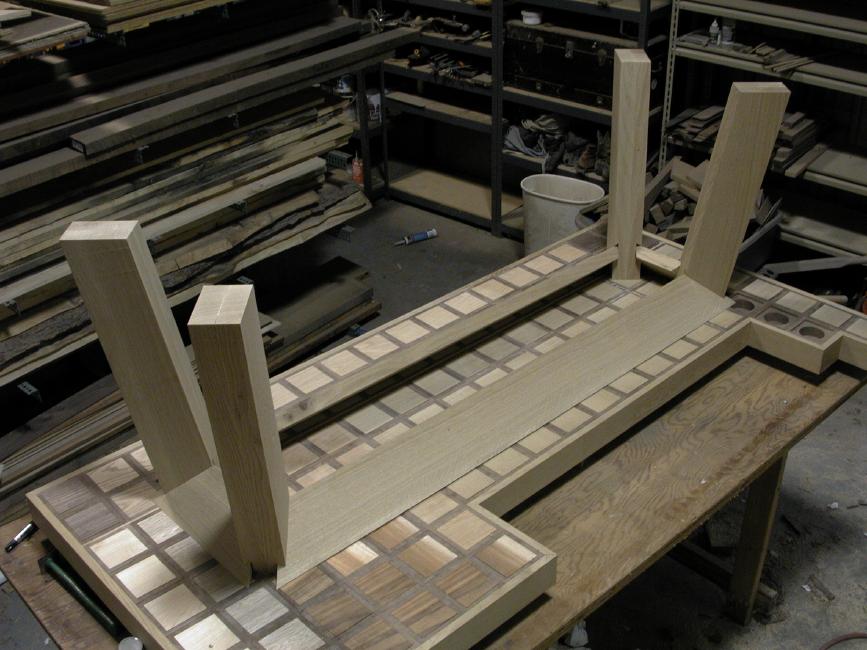
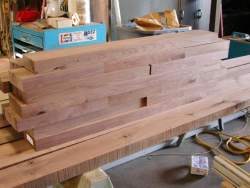
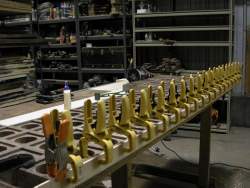
Next came rather a lot of gluing, first individual blocks:

Then sets of blocks:

A special strip separates the Lanthanide and Actinide series:
Finally two laminated sheets of 3/4" veneer core hardwood plywood
go underneath for dimensional stability (a item in short supply
in this climate, but critical for this table):
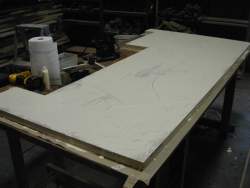
The edge that hides all this is glued on last:
Then attention turns to the element tiles. There are many questions.
Some are easy: The noble gases, pure and colorless, must of course be
hard maple for its light and pure color. (And for the fact that my friend Chris
would be insulted if I used the tree from his front yard for anything less noble,
like maybe Boron. Not that there's anything wrong with Boron
mind you, it's just no Xenon if you know what I mean).
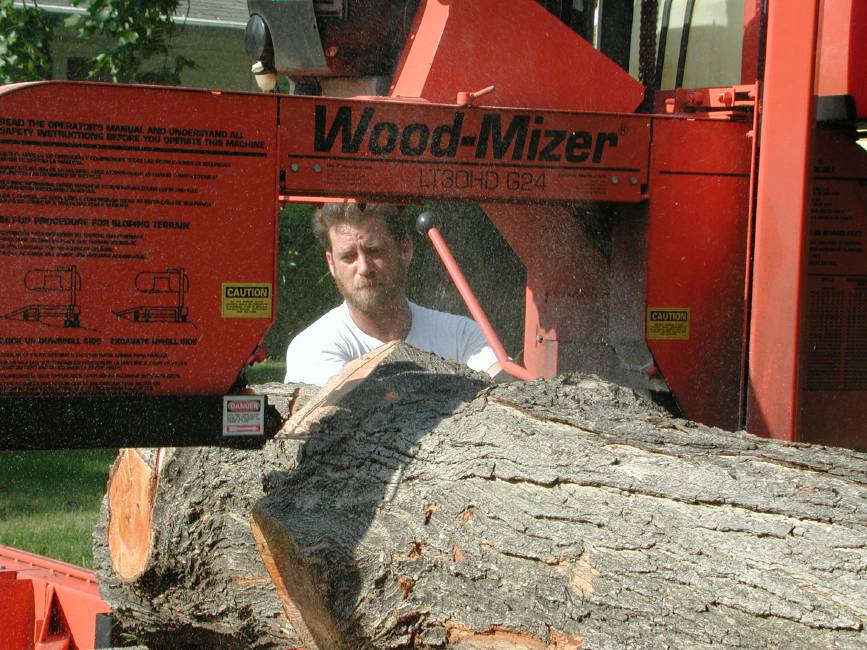
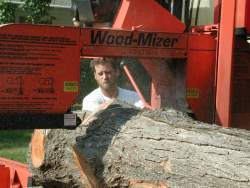
Here is a picture of Chris' Maple tree being sawn into logs by Chuck and his sawmill:
I don't have any pictures of it drying for a couple of years, but they would be kind of boring anyway
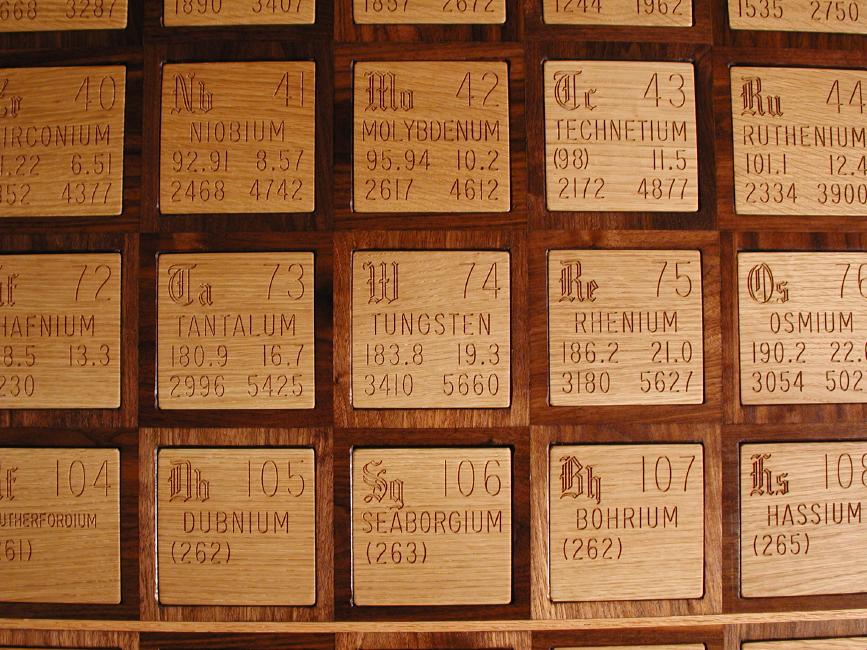
By far the most numerous group of elements is the transition metals (40 of them),
which fact aimed me in the direction of White Oak, because I have ample stock of it.
That choice allows the convenient further choice of Red Oak for the
rare earths, which are sort of a sub-group of the transition metals anyway,
and therefore should have a similar wood. Oak seems a satisfying choice
for this workhorse group of elements. Not pretentious, just good solid citizens
(OK, the platinum group metals probably would rather have been Rosewood or
something, but that's their problem).
Hydrogen was also easy: It is unique, unlike any other element in more
ways than any other element is unique. It is bizarre almost. Only
Gabon Ebony, the darkest and bizarrest available, would do. Unfortunately
I had foolishly traded the only piece in my possession many years earlier for
some gallons of Pratt&Lambert #38 alkyl oil varnish. God only knows
what I was thinking. Anyway, this forced me to pay a king's ransom
for a new one. Good thing there's only one Hydrogen.
Having some kind of idea of lightness equating filled shells from the noble
gases, I chose Birch for the alkali earths. OK, Birch isn't very light,
but then the alkali earths don't really have that much of a filled shell either.
The alkali metals are often found in murky jars of oil that for some reason
make me think of the color of Teak. So Teak it was for the left side.
The main metals group just had to be Cherry. Cherry is smooth, workable,
about as malleable as wood gets, and just generally metal-like, sort of.
Oh, and I really wanted to use as much as I could of the stunning Koa wood I had left
over from a previous project. The perfect solution was to use one board with
a very strong band of sapwood that went from Cherry-colored on one side to
Koa-colored on the other as the metalloid group (which includes many semiconductors).
It makes the transition from metals to non-metals beautifully, and of
course the non-metals are pure dark Koa.
That leaves only the halogens, and for some reason I chose Kentucky Coffee
Tree wood. I don't think it's very defensible as a wood for the Halogens,
but it was available for a fair price and it sounds peculiar. Halogens are peculiar, don't you think?
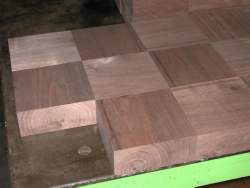
Having decided on the wood selection, I gathered them:
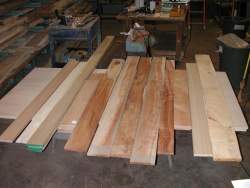
Then planed, ripped, and cut them to squares using the same
jig as for the blocks only smaller. Here they are laid out
without the blocks they fit in:
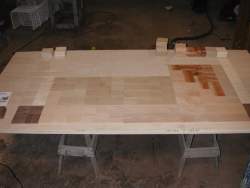
And here they are fit into the table from step 1:

The sensitive should avert their attention at this point,
because it's not a pretty sight when you take a
belt sander to wood like I did here. But if it
was to be smooth, it had to be done.
Fortunately, the random orbit sander hides the sins
of the belt sander, and the result is really quite
indistinguishable from one made with ten times
more anal retentiveness and slightly less sanding. (If you don't
know what I'm talking about, try gluing 120 blocks
of wood together without any variation in any of
three directions per block. For extra credit,
do it while the temperature and humidity vary
between 10 and 90 F and %, you can only work on it 2 days out of 7, and there are several three-year-olds helping you.)
Anyway, here it is all nice and smooth:

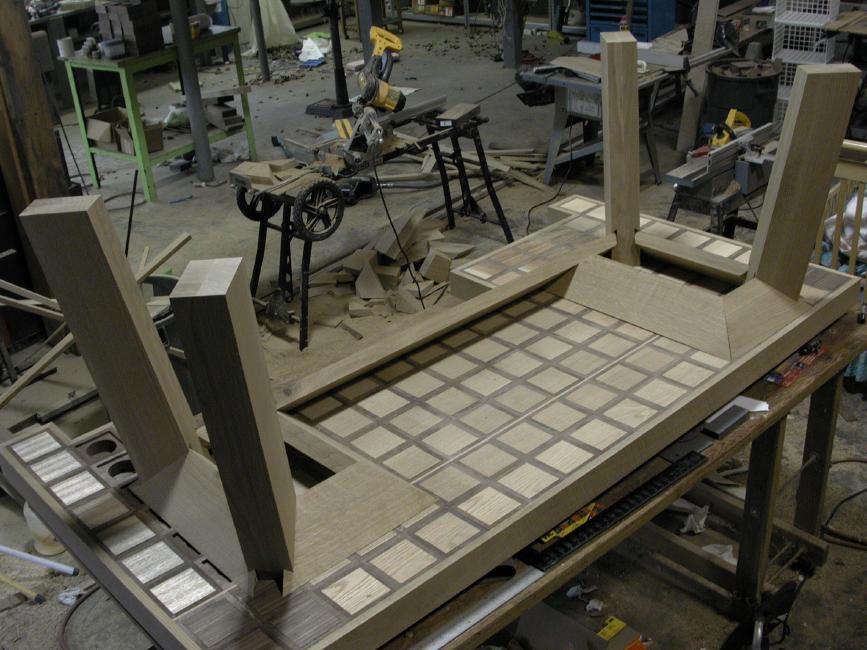
I left the question of legs until the end. My first plan just looked too tippy:
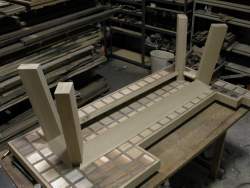
So I took advantage of the wider area on the right side to move one leg out farther than the other:
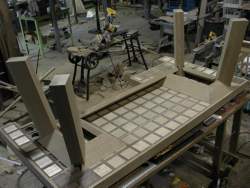
(Yes, it's 2x8 quartered white oak, and no, I wouldn't have
used it if I didn't have it cheap from an auction.) Those
funny angle mortises actually fit pretty well after they
were adjusted and trimmed.
Now came the part that dragged on for what seemed
like forever, even with Ed pitching in on the densities.
When you're going to engrave the physical properties
of all the elements in wood, there is (a) no room for
typos and (b) no room for making updates as
knowledge improves. This is a one-shot deal,
given how long it would take to re-make random tiles
from scratch.
So naturally Ed Pegg and I consulted several sources for each piece
of information (atomic weight, density, melting and boiling points).
You'd think basic things like the boiling point of aluminum
would be largely settled by now, but no that's not the
way it works. Even allowing for allotropic differences,
there is a remarkable degree of disagreement about dozens
of quantities, even about which is the densest element of
all (Osmium and Iridium have traded places over the years).
People can't even agree on the spellings of these things. The British, for example, spell Aluminum as Aluminium,
and try to make some kind of case why this is better. I just want to know why they don't spell Platinum as Platinium too.
And Caesium for Cesium? Come on, no one has spoken that language seriously for a thousand years!
I decided to use the common American names as used in industry. If you want to buy this stuff,
these are the names you use.
We omitted a few numbers for lack of consensus, and in
other cases just threw up our hands and let the sources
vote for the most likely correct answer. It was disturbingly
inconclusive in many cases, but we had to press on.
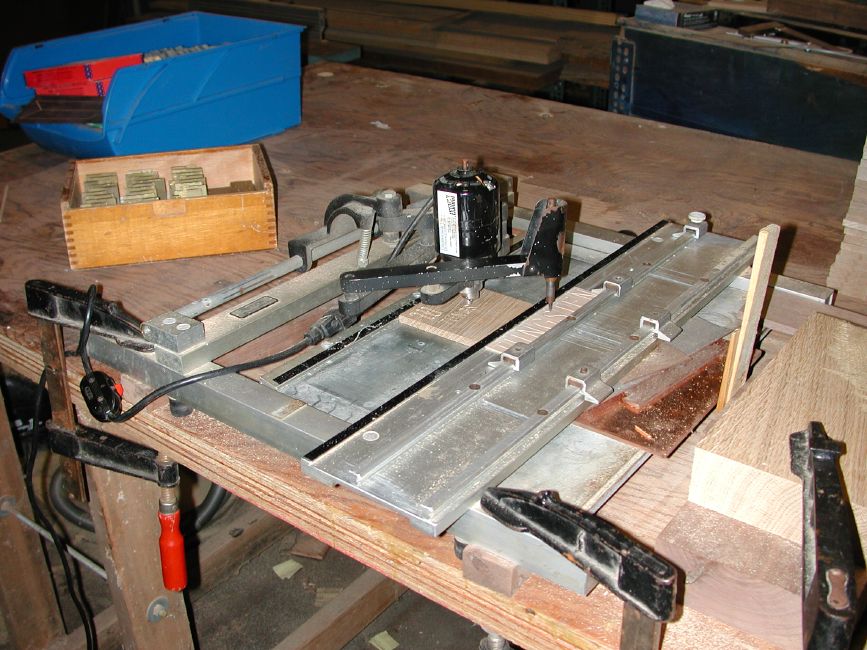
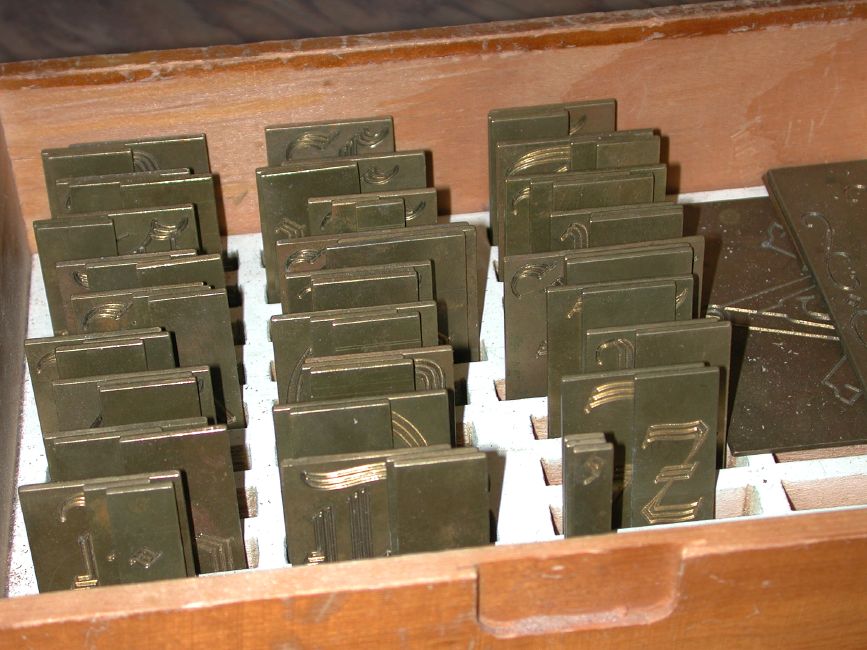
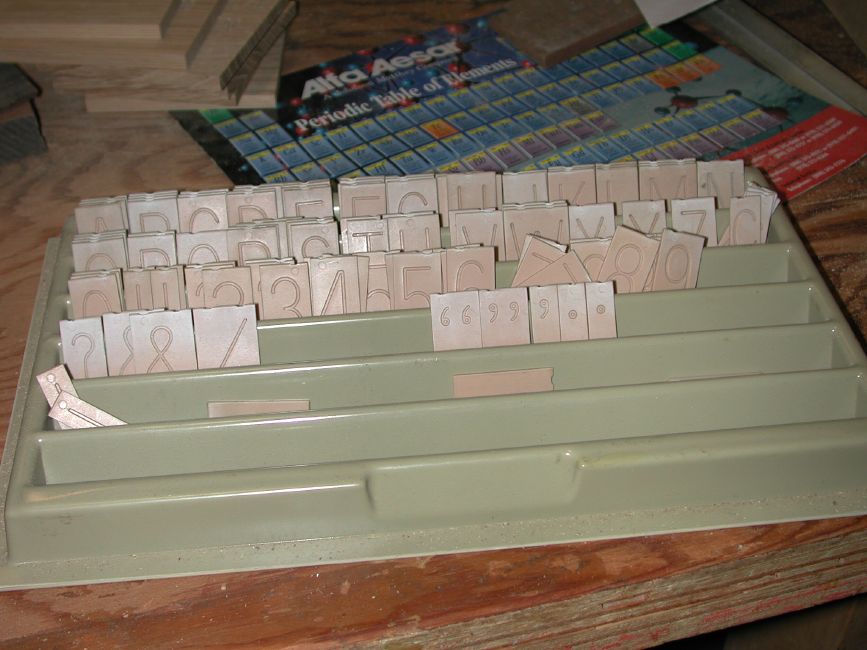
One small obstacle still stood in the way of engraving the tiles:
None of the font templates I had contained lower case letters,
and you can't make proper element symbols without lower
case letters! Font templates with lower case letters are
very expensive.
Fortunately a local jewelry store went out of business just
in the nick of time, and I was able to purchase
a stunning set of brass upper and lower case letters in a very
ornate gothic script, larger than any other fonts I had ($400 new, mine for $10 at auction).
Though Chris of the noble gas wood felt the font was garish
and out of place, I thought it was just perfect for the element
symbols, which after all are often written in a bold or flowery
script on printed periodic "tables".
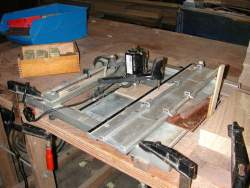
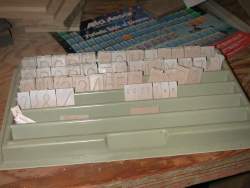
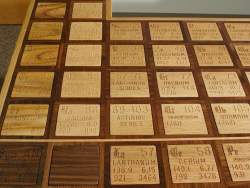
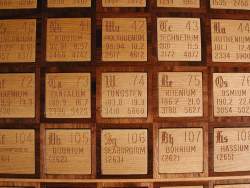
Having gathered the data and the fonts, I engraved the tiles, doing one
attribute at a time, first all the atomic numbers (so the tiles
couldn't get mixed up), then all the symbols, then the
names, and so on down the tile. Ed came over one evening and we
did all the atomic weights and densities by midnight.
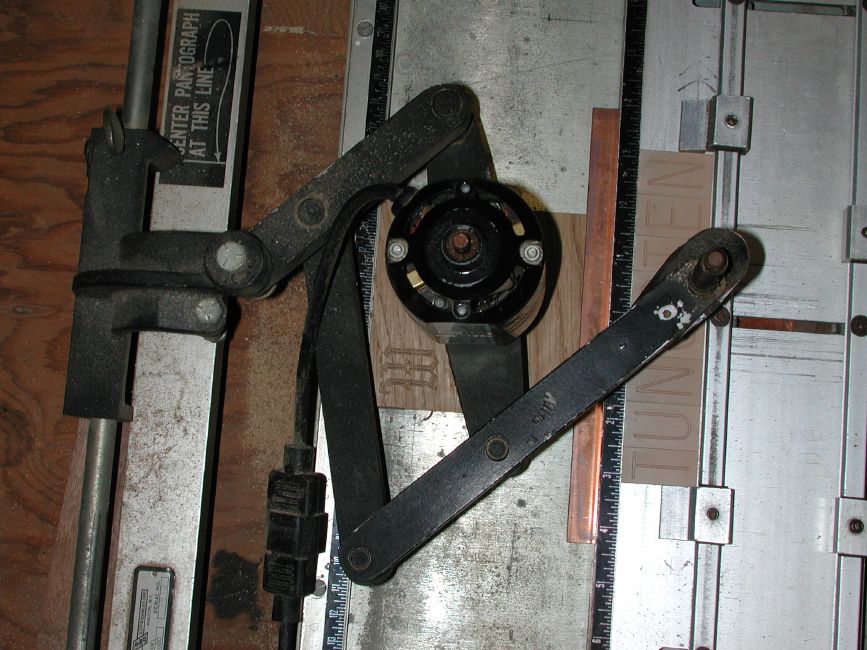
Here is the engraving machine in action:
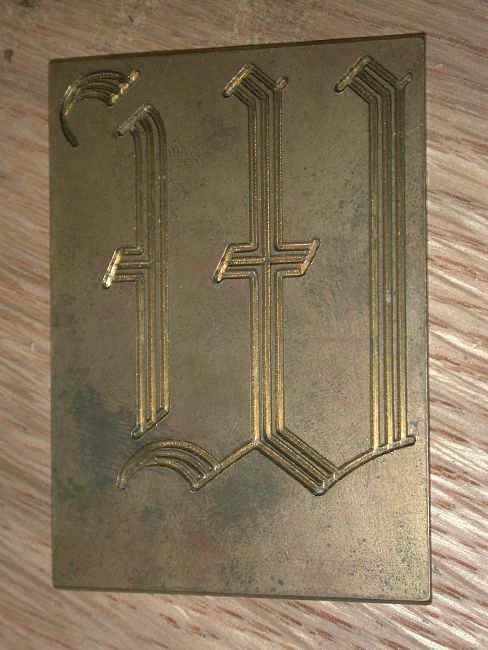
Here are the two font templates. Isn't the brass one gorgeous?

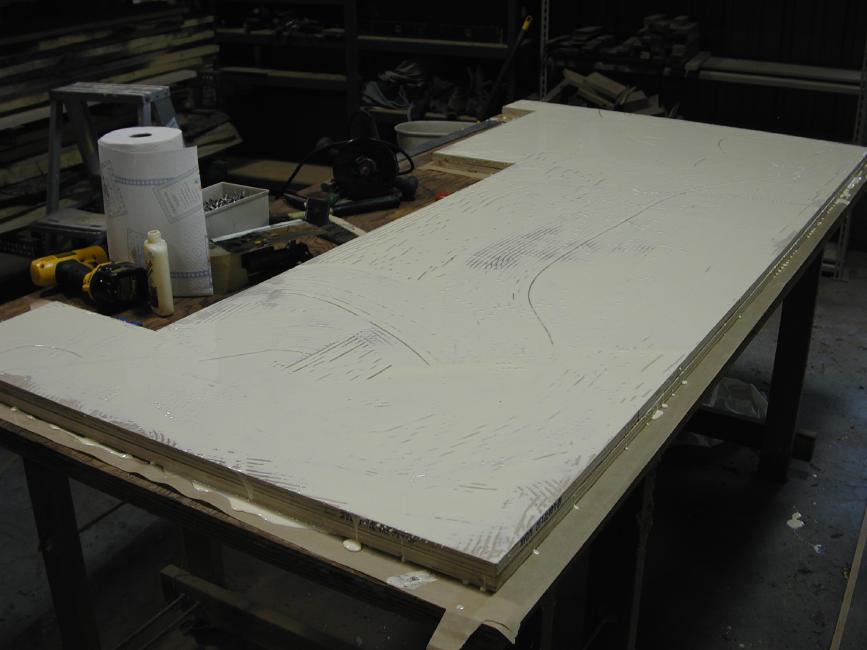
After a whole lot of engraving, I dipped the tiles in Watco Danish Oil finish, dried them off, and finally relaxed.
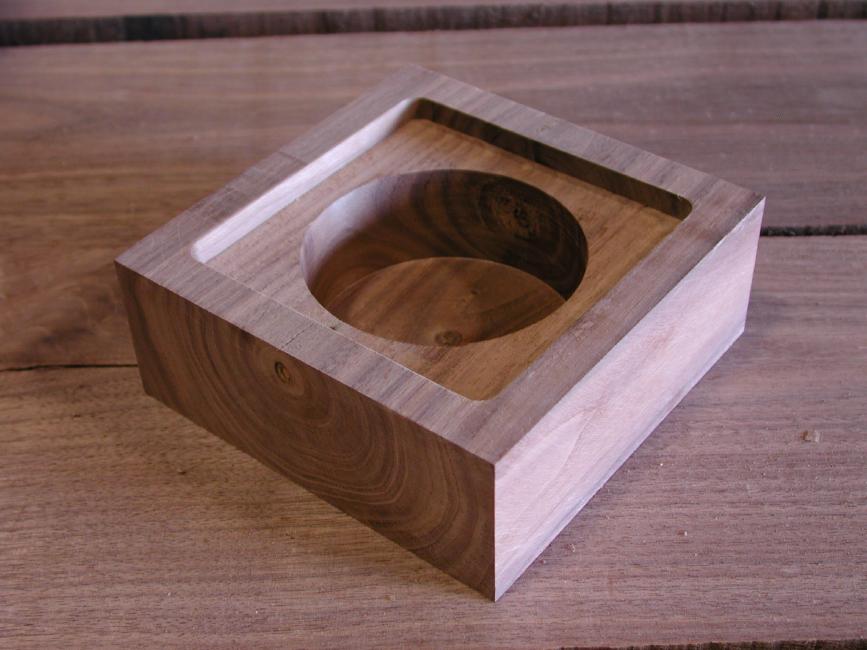
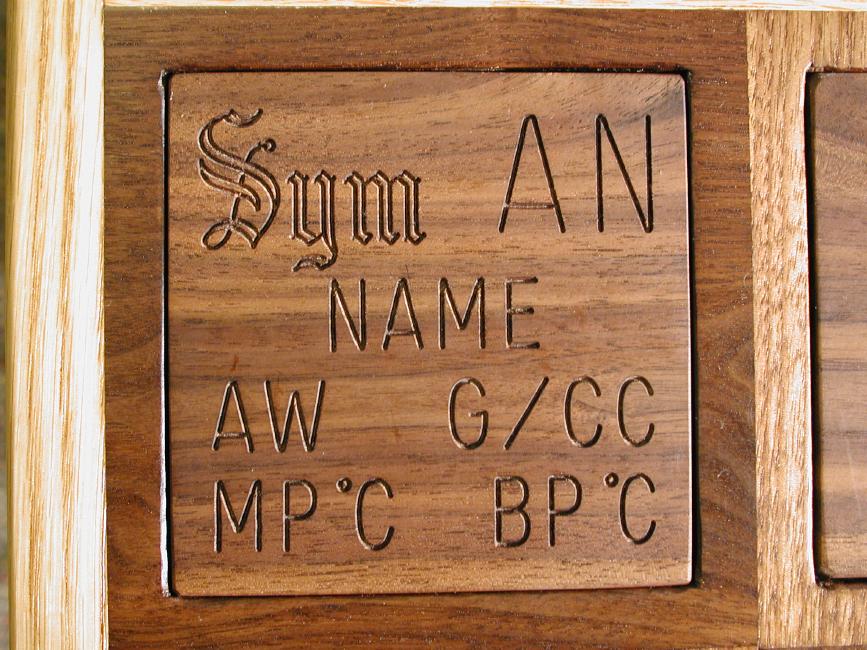
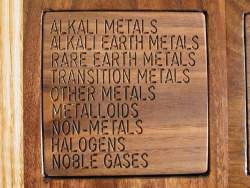
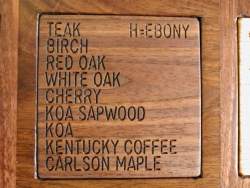
Here is the key tile that identifies the data on the others:

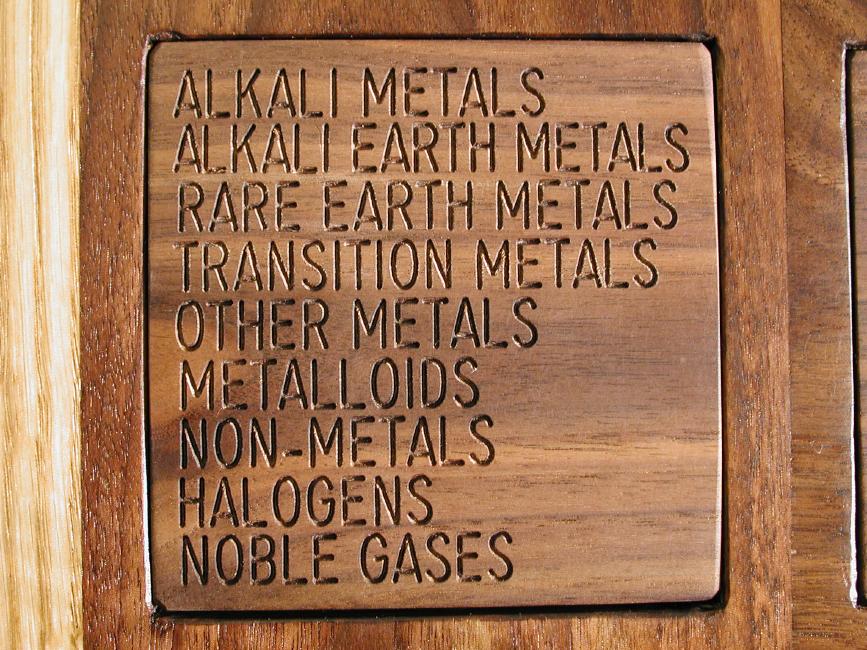
And here is the Rosetta stone that links the worlds of wood and chemistry.
If you know your woods, you can use this to identify the element groups.
If you
know your chemistry, you can use it to identify the types of wood. If
you don't
know either, sorry.
Varnishing was an issue. Normally I would take a table down to our
local Amish community,
which has the most modern high-tech catalytic urethane varnishing equipment
around.
But I thought that any kind of surface finish would inevitably fill the
engravings unevenly and
result in harder-to-read lettering and unsightly flaws. So I decided
on a simple penetrating
oil finish for the tiles. I got a small vat of it and soaked them in groups of 10 at a time.
For the matrix of Walnut (which is primarily visible as one inch wide stripes
of checkerboard
grain between the tiles, I wanted something with a bit more gloss and richness
to it. I chose
a hand-rubbed oil and beeswax reproduction antique finish. The contrasting
semi-gloss
and matte finishes between the tiles and the grid is quite attractive, but
virtually impossible
to photograph.
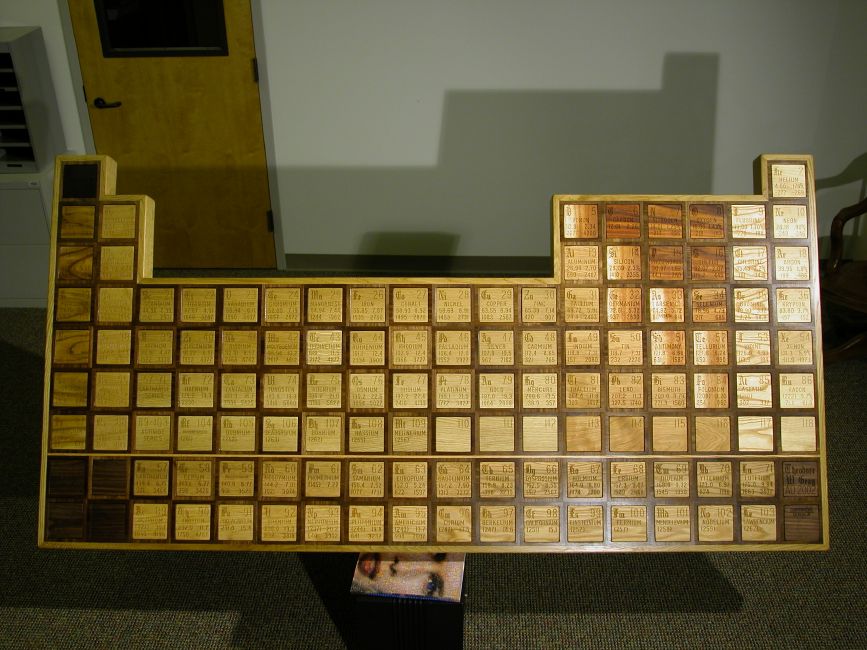
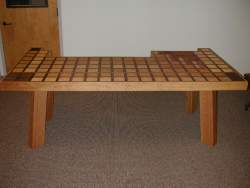
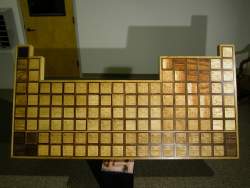
This is what it looks like in the end:
Then of course there's the whole question of collecting elements! I
won't even begin to get into that, other than
to give you one example, the isolation of zinc from roof flashing. It's
done by melting.
You start with a bucket of junk from the local scrap metal dealer:
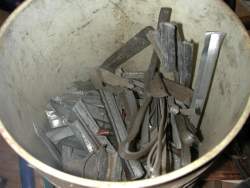
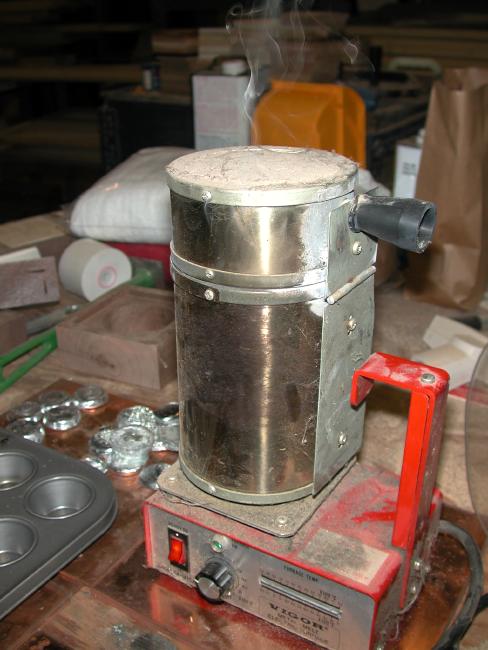
Melt it down in something that gets hot (for zinc a good stove will do,
but this dandy is handy for many of the others):

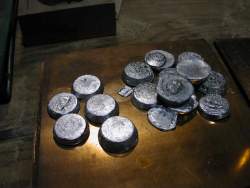
Pour it into something that won't melt, crack, or explode (plaster is nice),
and you'll get some metal samples:
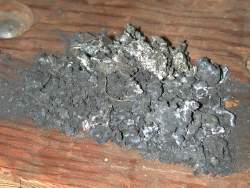
and some more of that entropy:
This technique works well for the isolation of copper and aluminum from
electrical wire, tin from fishing weights, lead from plumbing lead, etc.
You'd be surprised how many elements are available at Walmart,
and the isolation is far easier than from the ores.
While many element collectors (is there a society I should know about?)
seem to concentrate on authentic mineral samples, I've decided to
go with a theme of manufactured objects that use pure elements for
their intrinsic properties. I think it's absolutely amazing how
many of the elements actually are used straight up in by and large
pure form, in common objects you'd find around the house,
farm, shop, or battleship. (By the way, if you have any depleted Uranium from Afghanistan,
I could use it.)
Home
All text and images on this website Copyright (c) 2002 by Theodore W. Gray.
|